ඊට හේතුව පැහැදිලි වෙනවා. ඒවා විශාල ඉස්කෝලවල අන්තර්ජාලය ලබාගැනීම සඳහා විශාල අඩංගු සංඛ් යාවක්.
අතීතයේදී විශාල සංවිධානය සඳහා විශාල සංවිධානය සඳහා වීඩියෝ බිත්ති විය. අද, LCD දර්ශන තාක්ෂණය තුළ ප් රයෝජන වලට ස්තුතිවන්තයි, ව් යාපාරික හා ව් යාපාරවල් ගණනාවක් පමණක් තිබෙනවා. Qtenboard සම්පූර්ණ ව් යාපාරික විසඳුම ලබා දෙනවා.
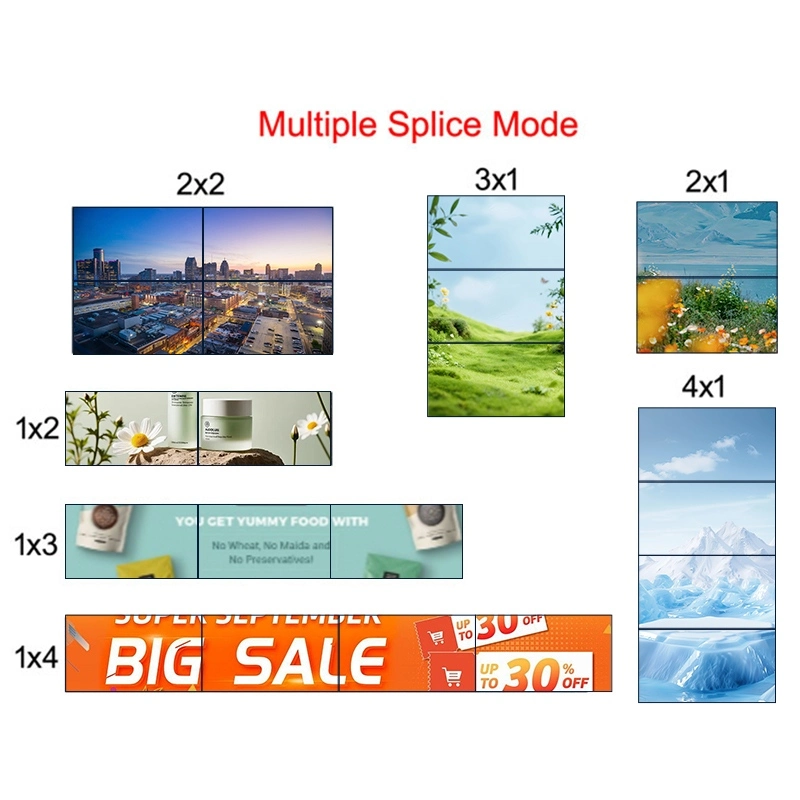
පළමු පියවර වන්නේ දර්ශන සංඛ් යාව සහ ඔවුන්ගේ සැලැස්ම ගැන තීරණය කිරීමයි. සාමාන් ය විකල්ප දෙකක් ඇත:
සැකසුම් 1: වර්ග තත්වය
සැකසුම් 2: දිගු සැකසුම්Name
නිවැරදි සැලැස්මේනය දර්ශන විසඳුම, අංශයේ ප් රමාණය සහ අන්තර්ජාලය සම්පූර්ණ සැකසුමට ගැලපෙනවා.
දකුණු පැනලාම් තෝරාගැනීම වැදගත් පිංතූර ගුණාංග හා දිගු කාලීන විශ්වාසවන්තතා සඳහා. LCD වීඩියෝ පුවරු තෝරාගත් විට, මේ සාක්ෂි සලකා බලන්න:
Qtenboard පැනල් නිවැරදි වර්ණ නිවැරදිතාව, ඉහළ වෙනස්කම්, වර්ෂ 178 ° දක්වා දක්වන විට, වීඩියෝ බිත්තිය වශයෙන් පැහැදිලි හා සමානයි.
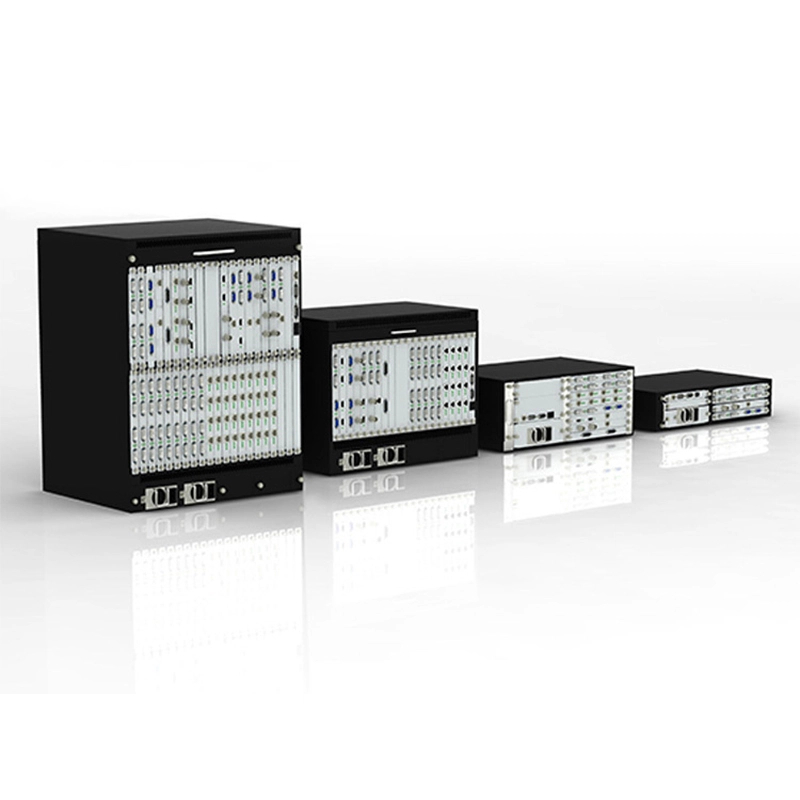
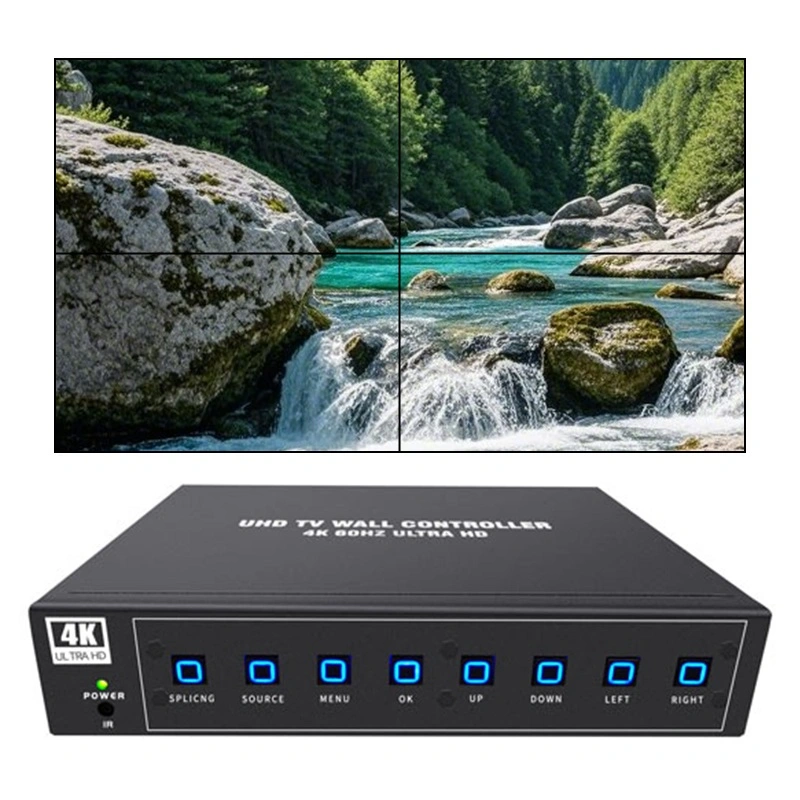
වීඩියෝ බිත්ති පාලකයක්
පාලකය තහවුරු කරගැනීම, නිවැරදි ස්ථානය, සහ සෑම තිරයකම සම්බන්ධකම් සම්බන්ධ කරගත හැකියි.
නියම ස්ථානය, ස්ථිරත්වය සහ දියුණු කිරීම සඳහා වැදගත්.
කේබල් පාලනය කිරීම අත් යවශ් ය, පිරිසිදු පෙනුමකට. මාර්ග ශක්තිය හා සංඥා කේබල් වල හෝ පැනල් වලට පිටිපස්සේ අඩු කරන්න.
වීඩියෝ බිත්තියේ පෙන්වන අන්තර්ජාලය තරම් වැදගත්. මූලය:
Qtenboard වීඩියෝ බිත්ති බිඳ දර්ශනය, සම්පූර්ණ තිර අන්තර්ගතය සහ ක් රියාත්මක වෙනස් කිරීම සහ, විවිධ අවශ් යතාවන්ට අනුකම්පාවක් ලබා දෙනවා.
පැනල් ස්ථාපනය කරලා පාලකය සම්බන්ධ වීමට:
Qtenboard මෙම ක් රමයේ වෘත්ති සහාය සහ මඟ පෙන්වීම් ලබා දෙනවා සෑම ස්ථානයකම ඉහළ දර්ශන ප් රමිති අනුගමනය කිරීමට.
නිවැරදි නඩත්තුව
ක් රිස්තියානි ක් රිස්තියානීන් හා නියම පරිපාලනය සමඟ, Qtenboard LCD වීඩියෝ බිත්ති 24/7/365 ක් රියාත්මක කරන්න පුළුවන්.
පිහිටීම:මැලේසියා
මානකරණය2×4 LCD වීඩියෝ තත්වය
පුවරුවේ ප් රමාණය:අඟල 55 ක්
බෙසල් පළල:3.5 mm.
විස්තරය:1920×1080 DPIName
ස්ථාපන කාලය:දවස් තුනක් නිෂ්පාදනය පරීක්ෂා කරන්න
යෙදුම් දර්ශන:පාලක කාමර, රැස්වීම් කාමර, ප් රකාශන ශාලා
වෘත්තීය විද් යාත්මක වීඩියෝ බිත්තියක් ගොඩනැගිල්ල අවශ් ය වේ. මේ පියවර අනුගමනය කරමින් Qtenboard & # 039; ව් යාපාරික LCD වීඩියෝ බිත්ති විසඳුම, ව් යාපාරික, සහ සංවිධාන නිර්මාණය කළ හැකියිබලපෑම්, විශ්වාසවන්ත සහ දර්ශන දර්ශනස්වාමිපුරුෂයන්ට සහ සන්නිවේදනය දිය යුතුයි.
නිෂ්පාදක තොරතුරු දෙස බලාගෙන එහි ක් රියාකාරකම් හා සැබෑ ක් රියාකාරකම් ගැන ඉගෙනගැනීමට ක්ලික් කරන්න.
📖නිෂ්පාදක ඇතුළත්ව කියවන්න
 EN
EN  MAY
MAY  TH
TH  CHT
CHT  ID
ID  BUR
BUR  FIL
FIL  HKM
HKM  LAO
LAO  SIN
SIN  VIE
VIE